Help Uploading Your Files
Step #1. Download and install the free software: FileZilla ClientStep #2. Open the FileZilla Client software. Next press "File" and then select "Site Manager". Enter the appropriate information for host, user, and password. Finally, press the "Connect" command button.
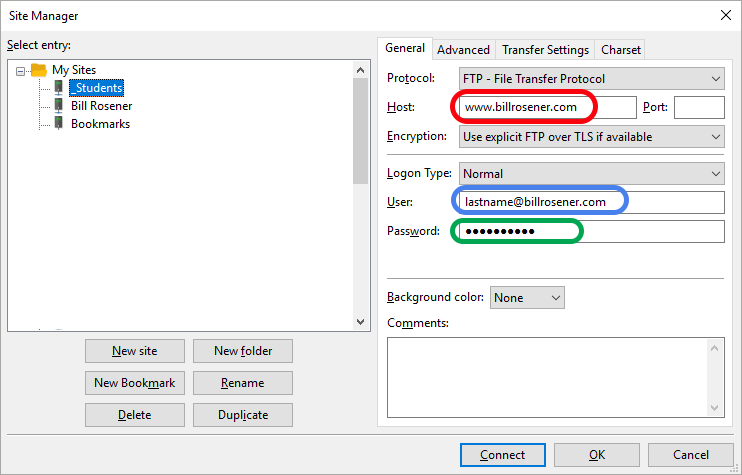
- For students uploading to the instructor's website
(billrosener.com), the "User" would be your NSU username concatenated with
"@billrosener.com". Your "Password" would be your firstname (lowercase as
listed in NSU Blackboard) concatenated with "ABC$123DEF#". These additional
characters are required to meet the minimum password strength.
Host: www.billrosener.com User: NSUusername@billrosener.com Password: firstnameABC$123DEF# As a complete example, if your NSU username is "smith123" and your first name is "Tyler" you would enter the following information:
Host: www.billrosener.com User: smith123@billrosener.com Password: tylerABC$123DEF# Step #3: Search for the file that you want to upload in the left side of the application.
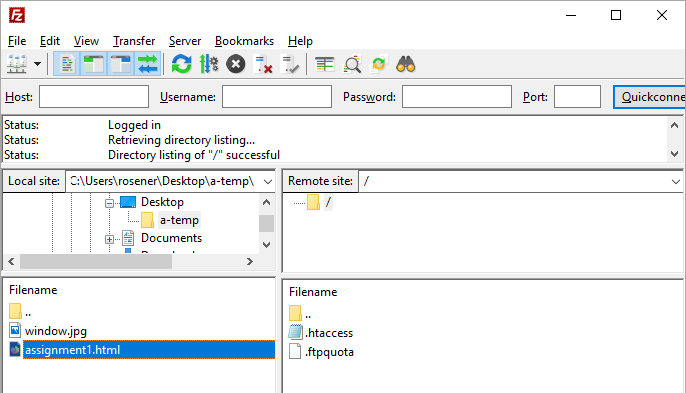
Step #4: "RIGHT" click on the file that you want to transfer and select "Upload".
Step #5: Confirm that you have successfully uploaded your content by
viewing it online.
Note: For security purposes, most web servers do not display a directory listing of all files in a folder. To allow a directory listing, a file called ".htaccess" containing the text "Options +Indexes" is placed in the folder.